Wednesday, December 12, 2012

Risk managements blahs'


Risk Managements What’s, Where’s, Why’s, How’s, and Who’s
Tyler Swartz
12/03/2012

When you make a risk management plan, it should serve three important entities: the employee, the client, and the company. The plan should include the identification of all known risks, an evaluation of those risks, and you should implement an action plan to attack and manage identified risks. When attempting to manage the risks you have decided worthy, managers/guides have four options on how to mitigate those risks: reduction, retention, transfer or avoidance. If you are a more proactive/ aggressive manager/guide, the process at which to mitigate risk involves inclusiveness and a stellar attitude that says/shows “prevention is the key”. This plan of attack identifies all of the employee’s specific responsibilities, establishes a sense of security, and grounds a set of safety rules, regulations and procedures. More importantly when constructing and implementing risk management objectives, you most definitely need to identify an onsite risk manager. While developing the stages of the risk management plan, the onsite risk manager can learn the essential elements of the risk management plan. Once you go through with the implementation, and after the plan is completed, the onsite risk manager should take a Leadership role in putting together a “risk management review committee”, as well as seeing that suggestions are produced for improving the way the plan(s) are implemented.

More and more often these days, volunteers are playing a higher card in assisting employees and employers as too providing direct services to the public. For this reason, is exactly why you need a specific criterion to determine their relationship, obligations, duties, training, and their limitations within the employer’s vision. It is very vital that this criteria or contract (preferred) is emphasized and followed to par. Because, a lot more risk stems from the fact that he/she is a volunteer, not a trained professional. Thus, they should not wreak the benefits of a professional, or serve certain responsibilities such as the professional might/does.

The conduction of these programs, events, and other activities widely exposes the employer to a variety of risks, such that could result in financial loss for individuals and employers involved in an accident or situation while performing activities within the criteria. A risk management plan reduces the threat of financial obligation that could possibly arise from an accident in the program being preformed. If you can effectively enforce risk management practices, it will greatly maximize the minimization of accidents and reduce the obligated liability the employer has to participants, volunteers, and employees.  Possible risks can arrange from potential hazards involving employer facilities and recreational sites, activities that knock on risk’s door, contracts (not conducting any), and the malfunction of equipment. These sections address the issues and bring to light all possible coordinative problems associated with personnel well being, program delivery, and the quality of management and its employees.

These are the risk management tools and procedures available to assist you in conducting daily operations and activities in a safe manner. Enjoy.

history of stand up paddle boarding


History of Stand up Paddle Boarding
Tyler Swartz
12/04/2012

Stand Up Paddle boarding, probably more commonly known as or SUP, but also in some distant parts known “SWEEPING” is derived from deep Polynesian roots. Polynesians would stand up in their canoes and search for fish to spear. Early settlers such as ship Captain James Cook in the 18th century, recorded watching canoeists sit in their canoe and catching waves and riding the tide. Thus, came “Stand Up Canoeing”. The Hawaiian translation for this is “Ku Hoe He’e Nalu” which means” to stand, to paddle, to surf, a wave.”
Now a day, the popularity of the ever vastly growing, modern sport “SUP” has been continuously originating in the Hawaiian Islands since the 1950s, when a group called the Beach Boys of Waikiki started standing on their long boards and use “outrigger” paddles to paddle out and about taking pictures of the tourists ‘trying’ to learn to surf. This is when the term of “Beach Boy Surfing” originated, which is just another name for Stand Up Paddling.

The Beach Boys of Waikiki brought the sport into world spectrum when they saw the opportunity to make some bank. After WWII, there was a huge tourism boom. Matson cruise liners dumped thousands of thrill-hungry Americans on the beaches of Waikiki under the shadow of Diamond Head. Its only natural they would want to try their size at the sport of surfing, or at least take a canoe surf under guidance of one of the many working Waikiki beach boys. After Duke Kahanamoku and his brothers got sick of the tourists, they formed a new generation of beach boys. These new prospects would lurk under the banyan trees and on the beach flirting with the girls, and often times harassing the tourists, until their bosses, waiting on the beach front, would call them to action for the site of another ship of newly-arrived thrill-seekers hit the horizon.

This hustle went on in Waikiki through the 60s and 70s. Eventually long boards got smaller and surfing began to change, but the SUP community never really realized the fact that, with a few basic refinements of equipment, beach boy surfing would be become would wide fun. Until a few beach boys like John Zabatocky, who started to surf with a paddle to take photos and soon, paddle surfing was his only form of surfing. Still going hard in his 80s, John is a true pioneer of SUP, along with Bobby Ah Choy, who made the final of a SUP event in 2007, just weeks before his passing.

Today, you can find people SUPing down rivers, and skim boarding along the coast line at any beach, in any state, or country. All thanks to the Polynesians and their canoes, and the Hawaiians and there hustle.

San Juan Sea Kayak - Joel Fischer


Sea Kayaking Adventure San Juan Islands Pre Trip
This is a beautiful six day sea kayaking trip through the San Juan islands. We will be kayaking the water ways and coastline of the Pacific Northwest and the San Juan islands. The back drop for this trip will be the North Cascade mountains and the Olympic range mountains. You will be camping in and exploring madrone and fir forest, as well as wonderful marine life. Bald eagles fishing, sea stars, seals, and whales breaching are some of the things you might experience.
Day One: Leave from Anacortes on the ferry to Lopez island. We will shuttle to Spencer Spit state park to set up camp for the night. At camp we will re pack our bags for our trip, then eat dinner and get to know each other.
Day Two: We will have breakfast and the pack our boats for the start of the trip. We will leave Lopez island and head for the Upright Channel towards Indian Cove. We will set up camp on the south side of Shaw island.
Day Three: Eat,pack boats and head up the West side of Shaw island into the San juan channel. We will head to Jones island off the coast of Orcas Island and camp for the night.
Day Four: Stay on Jones island for the day and night. Explore the west side of Orcas island , Wasp islands, and lovers cove. Explore madrone and fir forest on Jones island.
Day Five: Pack up and take the spring passage around the north side of Shaw island. head back to Spencer Spit state park on Lopez island. Stay the night and have one last dinner.
Day Six: Pack up and head to the ferry. Take the ferry to Anacortes and be on our ways.
Joel Fischer WL222 Final Paper Pre TripEquipment and Clothing
! We will provide all the kayaking and camping equipment. Sleeping bags available upon request. You will need to bring personal hygiene kits and comfortable clothing for dry suits and campsites. The trip is six days five nights you should be dressed for sandy and rock beaches, forest trails, green vegetation, and water travel.
Mode of Travel and Rate of Travel
! We will be cruising in 21ft sea kayaks, they hold two people and all the gear. We will travel four to six hours a day and paddle six to ten miles a day. We will practice Leave No Trace principles on the water and at camp.
Accommodations
! This will be a camping trip, there will be three to four people to a tent. There will be a foldable toilet and outhouses. Baths can be taken by heated buckets of water.
Meal Plan
Breakfast: Pancakes, Granola, French Toast, Oatmeal, Fruit Lunch: Bagels with cream cheese and locks, sandwiches, wraps, fruit and trail mix
Dinner: Burritos, Pasta and Bread, Chili and Cornbread, BBQ, Stir Fry, and Enchiladas !
Fun Facts
• ! The San Juan islands are in the northwest corner of Washington State. There are over 170 island in the San Juan islands. They are 80 miles north of Seattle in the Puget Sound.
Joel Fischer WL222 Final Paper Pre Trip
• 15,000 years ago glaciers receded from Washington state and left behind a deep inland sea called the Puget Sound.In between the Olympic mountain range and the Cascade mountain range the San Juan islands are protected from the pacific ocean storms.
• Over 1,000 miles of saltwater shoreline. • Ecosystems include coastal zones, wetlands, and tidal zones.
• San Juan's are in a rain shadow and receive as little as 15 inches annually compared to the Hoh rainforest which receives over 150 in of rain.
• San Juanʼs have the highest concentration of nesting bald eagles in the lower 48 states.
Risk Management
! While on the water you must wear your PFD, and if you are approaching water make sure your PFD is fasten and tight. You must also have a whistle on your PFD for communication. We will be in a very moist and wet environment so dress for those conditions.
! Beaches and Islands will have rockʼs and sticks that may be sketchy for walking and playing around. The Puget Sound waters can sneak up on you and sweep you away. Never turn you back on the water and know your tides.
Leave No Trace
We will follow the seven leave no trace principles.
• Plan ahead and prepare • Travel and camp on durable surfaces • Dispose of waste properly • Leave what you find • Minimize campfire impacts • Respect wildlife • Be considerate of others

Tips for Leading a Successful Climbing Trip


Andy Hamilton


            There are many different organizations and guide companies out there that offer a variety of different rock climbing experiences.  Each of the trips has their own advantages and disadvantages to both the client as well as the guides. The ability to accommodate all aspects of a rock climbing experience is a very tricky task and has to have a little bit of luck for it to run smoothly.  I am going to give some ideas that should be considered when leading your next outing to the crag. I’m not going to technical into gear, techniques, or overall daily breakdown. These are just a few tips from my experiences leading, teaching and being led…

Know Your Clients
Whether you are leading a group of kids, a woman’s adventure club, or a group of somewhat experienced climbers, the most important part of a successful day is making sure you get to know everyone in your group. Establishing a friendly and trusting relationship will build the groundwork for a smooth trip. If the group you are leading has no experience climbing, they are probably going to have a little bit of fear and anxiety about what the day is going to hold for them. It’s probably not a good idea to start of with some horror stories about taking 40-foot whippers. Instead, start off with a little icebreaker or some other activity to get everyone’s ready for a fun day. You could also start off by letting them know your (positive) climbing experiences and background, so that it starts putting their minds at ease and makes for a less stressful day.  Sharing experiences and showing the clients your passion for the sport helps get them motivated and puts them in a better state of mind from the beginning. Establishing this trust and early friendship will help with the honesty that both the client and the guide needs for the day to go as smooth as possible. Trust and honesty are a huge part of any outdoor activity. Which leads me to my next point…

Balance Ability levels
The most efficient way I have found to help set up my day of guiding is to make sure you get some climbing history or experience levels from your clients before the actual day of the trip. This will give you the ability to plan your day better as to accommodate for beginners as well as climbers with experience. Having a varied experience level in a group of clients isn’t always a recipe for disaster. If you are the lone guide for the day, having someone that already knows belay techniques will be beneficial if you have to lead every climb to set up top ropes. Having to teach someone at the crag can be very unnerving the first few times you are setting up the climbs.  This is another reason that knowing everyone’s ability levels before the trip comes in handy, as you can plan to have a second guide to help setup ropes and demonstrate climbing techniques or plan to be at an area with a trail to the top of each climb.  The down side to having a varied skill level group is trying to balance the beginner day with the more adventurous day of climbing for the experienced client. Finding this balance can be tricky but it’s also doable. My best advice is to get everyone’s goals and expectations for the day early on so that you can plan accordingly.

Information?
From my short experience leading climbing trips I have hit a few speed bumps when it comes to the what information to put out to the group. I have had experience teaching college climbing classes and as well as working with guide companies leading multiday climbing trips. On one side I am suppose to teach almost everything that I know about climbing to a group so that the outcome is to have students that can eventually go out and climb on their own.  When it comes to guiding a climbing trip, the main point of the guide company is to make money and teaching a client enough information to the point they don’t need a guide would likely not lead to a future return of that client. Also not being informative enough would yield the same result. Again, this guiding gig seems to be a delicate balancing act of being able to make people happy and have the ability to adjust to different situations. Hopefully the company you are working for will have an overall plan for the trip and details as to how much information you are to teach.

Backups!
This is a broad range of things that I am talking about, having backup gear, back up food, back up locations, and back up knowledge and skills to get you through unexpected events. Back up gear is pretty obvious, as well as food. But what if a client has a food allergy or special diet and you are on a trip that provides lunch and all you have to eat is salami and ham hoagies?  Or what if a group of climbers show up and they are all roughly the same height, weight and shoe size. Having a broad range of food and covering all your bases with gear is just something that will take time to dial in and really depends on the situation. The back up knowledge I am talking about is safety and rescue techniques when things go wrong.  As a guide or just climbing with buddies, you do not want to get caught in this situation. Always have the tools to get you or your clients out of any situation that you will be putting them in. The other backup knowledge I’m referring to is information of a site, climbing history, teaching topics or anything else to fill in those awkward moments of silence during the car ride or waiting in line for that next climb. That leads me to the next backup, location. Having a backup location incase one crag is full,  there are weather problems, or some other unforeseen issue is a must in order to fulfill the expectation of the client.

These were just a few ideas for someone that is new to guiding or leading a climbing trip. When I first started, I thought that it was going to be a piece of cake and that I had all my bases covered, then Murphy’s Law. It seemed like I hit every one of these issues all on one trip.  To say the least, it was a huge learning experience and that is why I want to pass the knowledge on. Every trip is a learning opportunity for both you and the people you are guiding. 

Pre Trip Info: 3/4-Day Lower Rogue “Wild and Scenic” Rafting Trip. By Matt Davenport

!! Important Information For Planning Your Trip !!
Blossom Bar. 
               "The Rogue River is one of the original eight rivers designated as "Wild and Scenic" by Congress in 1968 for its amazing beauty and wilderness. The Rogue below Grave Creek is described by many as "floating through a zoo" due to the plentiful bald eagles, osprey, deer, bear, chinook salmon, steelhead, and wildflowers. The river has many fun Class II and III rapids with long pools in between. This is the best river in the world for families to enjoy and is a delight in an inflatable kayak."*
Mule Creek Canyon
!! Important Information For Planning Your Trip !!
*Floating the Rogue River is thrilling, enjoyable, and generally safe; however, river running and camping have inherent risks. Think before you act, use your common sense, and respect the strengths and hazards of the river.*

  • Trip planner / packing list - The following links are from a local rafting company, Rogue River Raft Trips. The links are examples of what you should look for when hiring a guide service. The links provide a general trip/overview of a guided trip down the Lower Rogue.
      Rainey Falls


      Basic River Safety:
      • When in Doubt, Scout.If you are not sure about a rapid, pull over to the shore and walk ahead to look over the situation.
      • When in Trouble, Be Active. When you ind yourself in a difficult situation or if your craft is out of control, always keep trying to help yourself.
      • Dress For Success; Wear Your Life Jacket. Make sure it is a U.S. Coast Guard-approved Type III or Type V model, best for whitewater boating.
      • Watch Your Step. River sandals offer the best traction on wet rocks from slips, trips, and falls. 
      • Wearing a life jacket on land can be the best protection if you fall.
      •  Most Accidents Happen in camp. This is where you will encounter sharp knives, hot stoves, toe-stubbing rocks, bees, yellow jackets, ticks, rattlesnakes, and poison oak.*
    Mule Creek Canyon

  • Camping/Lodging
Your trip should include the following:
  • Professional, experienced guides.
  • The best available rafting equipment, including Coast Guard approved life jackets.
  • Use of splash jackets & wet suits.
  • A secure dry box to store your luggage during the time on the water.
  • A day sized dry bag for items you need access to during the day.
  • Fabulous meals, from lunch the first day to lunch on the last day. 
  • Transportation back to Morrison’s Rogue River Lodge at the end of the trip.
Outfitters


NOTE FROM EDITOR: 

While I was a kid I often overlooked the scenery and the magical atmosphere the Rogue creates. The Rogue is a place that I have spent many years exploring. I have come to learn that this River is always changing and is very alive! This river can be a playground and also a burial ground. I have lost friends to this river and also have enough good memories to fill a lifetime. The Wild and Scenic section is far different then the day use section, the consequence is far higher once below Grave Creek. I recommend the lower trip to anybody seeking an adventurous trip. Plan strongly accordingly to the weather! Most of all, respect and enjoy this beautiful land! The trip typical takes 3/4 days but can also be stretched into 5-7 days. Side hikes are popular along with the Rogue River Trail that stretches from Grave Creek to Foster Bar, 35 miles.

Tips: Talk to local outfitters if you plan on running the lower section without the use of guides. This trip is possible without guides but I recommend doing your homework. There are many historical sites and interesting places to stop along the way. 


SOURCES:
http://www.c-w-r.com/rivers/rogue-river.html
http://www.rogueriverraft.com/
http://www.blm.gov/or/resources/recreation/rogue/files/FloatGuide04.pdf http://www.blm.gov/or/resources/recreation/rogue/index.php
http://www.echotrips.com/rogue/trip-itinerary.htm


Introduction

Introduction


Welcome to Adventure Programming. On this blog we want to cover as many things possible to help shape and educate future facilitators. Everything from risk management, group leading and even a few trips we designed ourselves. Want an introduction to lightweight backpacking or things to consider when rock climbing? Mountain bike touring or pre-trip planning tips? We have that covered and more. In this blog you will be able to find a wide array of information on leadership, risk management, introduction to various sports and even awesome trip ideas. This blog will be a continued labor of love ran by several outdoor educators trying to put as much useful information out there as possible. Thank you for stopping by!

Things to consider for Equestrian Trips


Benjamin Walsh
December 2nd, 2012


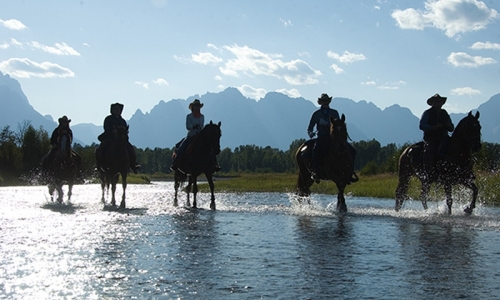
            There are many things to consider as a trip leader when you want to lead an equestrian trip.  The main ones that have to be taken into consideration are where you are going to be staying, how much training are you going to do for the new riders, do you have enough people going, is there room for everyone to camp, making sure that there is enough food for both the participants and the horses, whether or not camp fires are allowed and where, responsibilities of the riders, responsibilities of the leaders, proper equipment, and one of the most important parts, safety.

Where you are staying:
1.                  Are you going to be staying longer than one night?
2.                  Is there enough room for the horses?
3.                  What are the rules as far as the horses go?

Training:
1.                  Are you going to be spending time teaching new riders what to do?
2.                  How in depth do you plan on going with the lessons given the amount of time that you have allotted for the lessons?
3.                  Make sure to cover what to do in different situations that are not just simple straight forward situations.  Such as your horse gets spooked, stung by a bee, or your saddle starts to slide around your horse forcing you to get off.

Do you have enough people:
1.                  How many people are going to be going?
2.                  Are there enough horses for everyone?
3.                  Are there a large number of horses that will end up not being ridden?
4.                  How many experienced riders are on the ride compared to inexperienced riders?
5.                  How many riders are there to help out that are not part of the group who came to go on the trip?
-How many wranglers are there going to be?
 

Enough food:
1.                  Will the participants have enough to eat?
2.                  Is there going to be a variety of food for people to choose from?
3.                  How are you going to be getting enough food for all of the horses?
4.                  Is there going to be adequate water sources for the horses?
5.                  Inform the participants to bring their own snacks for while they are pit pm the trail, as the only food stop between camps is for lunch.
 
Campfires:
1.                  Can you have a campfire within the campgrounds that you are staying at?
2.                  Are there going to be any during the campfire activities such as songs and poetry?
3.                  Do you have to bring your own firewood, or do you have to get firewood while at the site, and from where?
-When doing an overnight trip, it is never a bad idea to have some form of entertainment such as songs and poetry. Since this is a horse trip, going with an old western theme is never a bad idea.

Safety:
1.                  Does every rider have a properly fitting helmet?
2.                  Does each horse have a properly fitted saddle?
3.                  Does everyone understand the safety rules and procedures before heading out on the trail?
4.                  Who is in charge if something where to happen?
5.                  How many First Aid kits are there, and where are they located?
6.                  Is there a way to contact emergency services?
7.                  Do you have medical information on each of the participants and the people who are helping to lead the ride?
8.                  How much experience do the leaders and the riders have?

Responsibilities of the riders:
1.                  Did they bring everything that they need for the trip?
2.                  How much are you going to have them do as far as taking care of the horses goes?
3.                  Is there any additional things that you will have them do that may be volunteer related?
4.                  Given the training, are there any additional things that you will want to be taught?

Responsibilities as leaders:
1.                  Making sure that the horses are ready for the trip before the riders get there.
2.                  Do you have all of your sites selected and ready?
3.                  Make sure that your gear is ready to go before the people you are leading on the ride.


Proper equipment:

 
1.                  Closed toed shoes.
2.                  Horseback riding helmet.
3.                  Long pants.
4.                  A saddle that fits your horse specifically.
5.                  Enough saddle blankets to keep your horse comfortable under you weight for long period of time.
6.                  Proper layers in case the weather turns for the worst (will still ride if it does, except for lightning or a blizzard).


Rules:
Make sure everyone knows them.  Especially the number one rule:
DON’T TICK OFF THE COOK!


Sources:
http://bestwoodbadgecourse.com/?attachment_id=322
http://www.jerrystrailers.com/Around_the_Campfire_Page.html
https://ilovehorsies.wordpress.com/horse/care/tack/saddle/
http://chicagoist.com/2006/11/22/hump_day_political_roundup.php
http://www.jacksonholenet.com/summer_recreation/horseback_riding.php